
Taking off
Measure on a plan
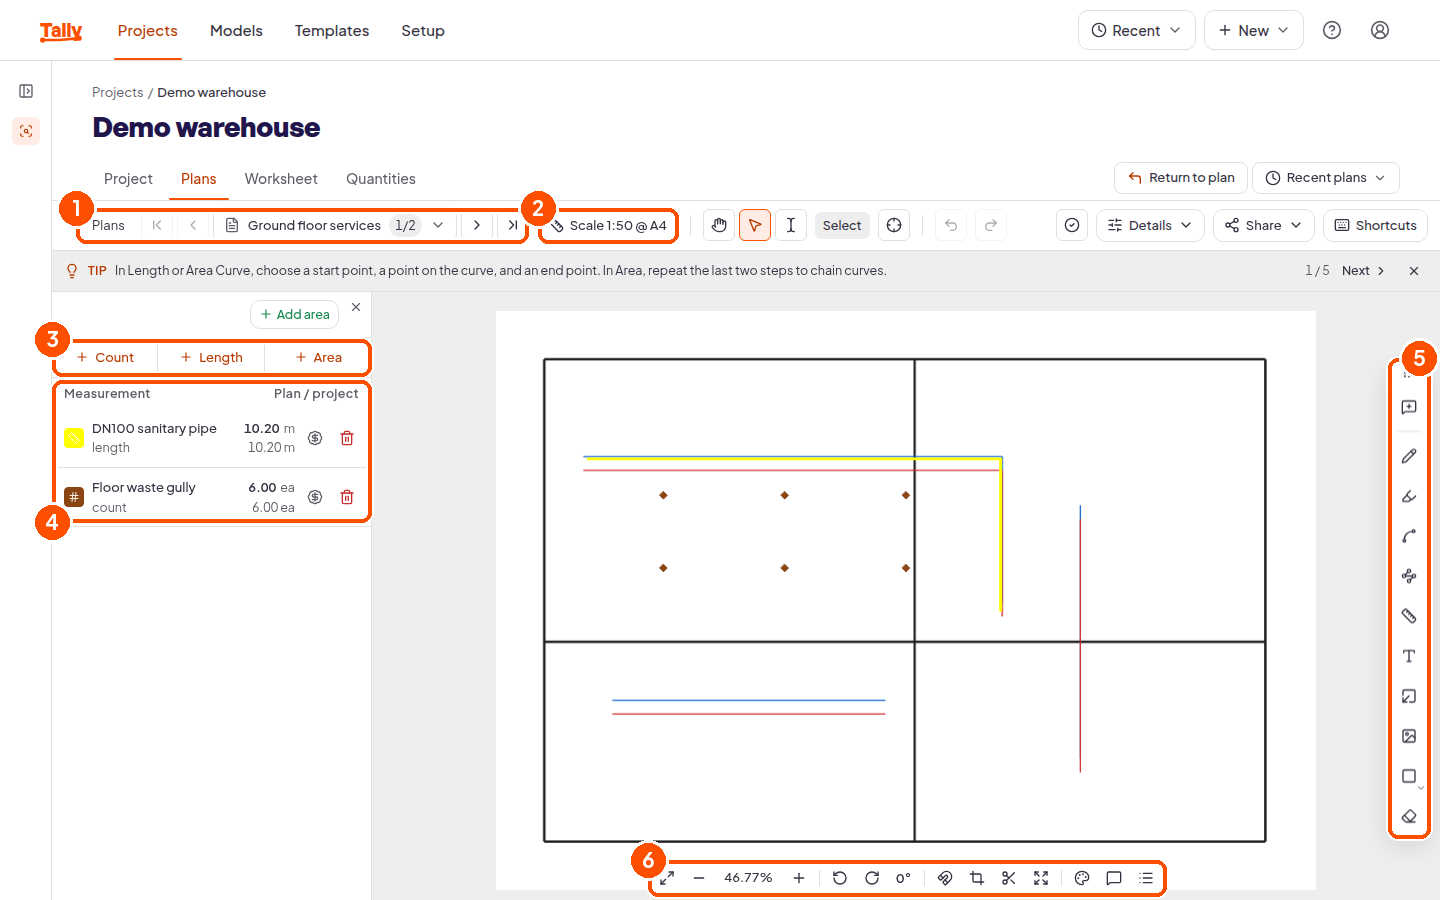
Count, length and area: the three measurements Tally takes.
Three kinds of measurement
Count is for things you tally one at a time: outlets, fixtures, posts. You click each one and Tally drops a symbol.
Length is for runs: pipe, cable, skirting, fencing. You click along the route, at each change of direction.
Area is for surfaces: floors, roofs, painted walls. You trace the outline and close it.
All three live on the panel to the left of the drawing. While the sheet has no scale they are switched off and the panel says “Set the sheet scale to start taking off.” See set the scale.
Take one off
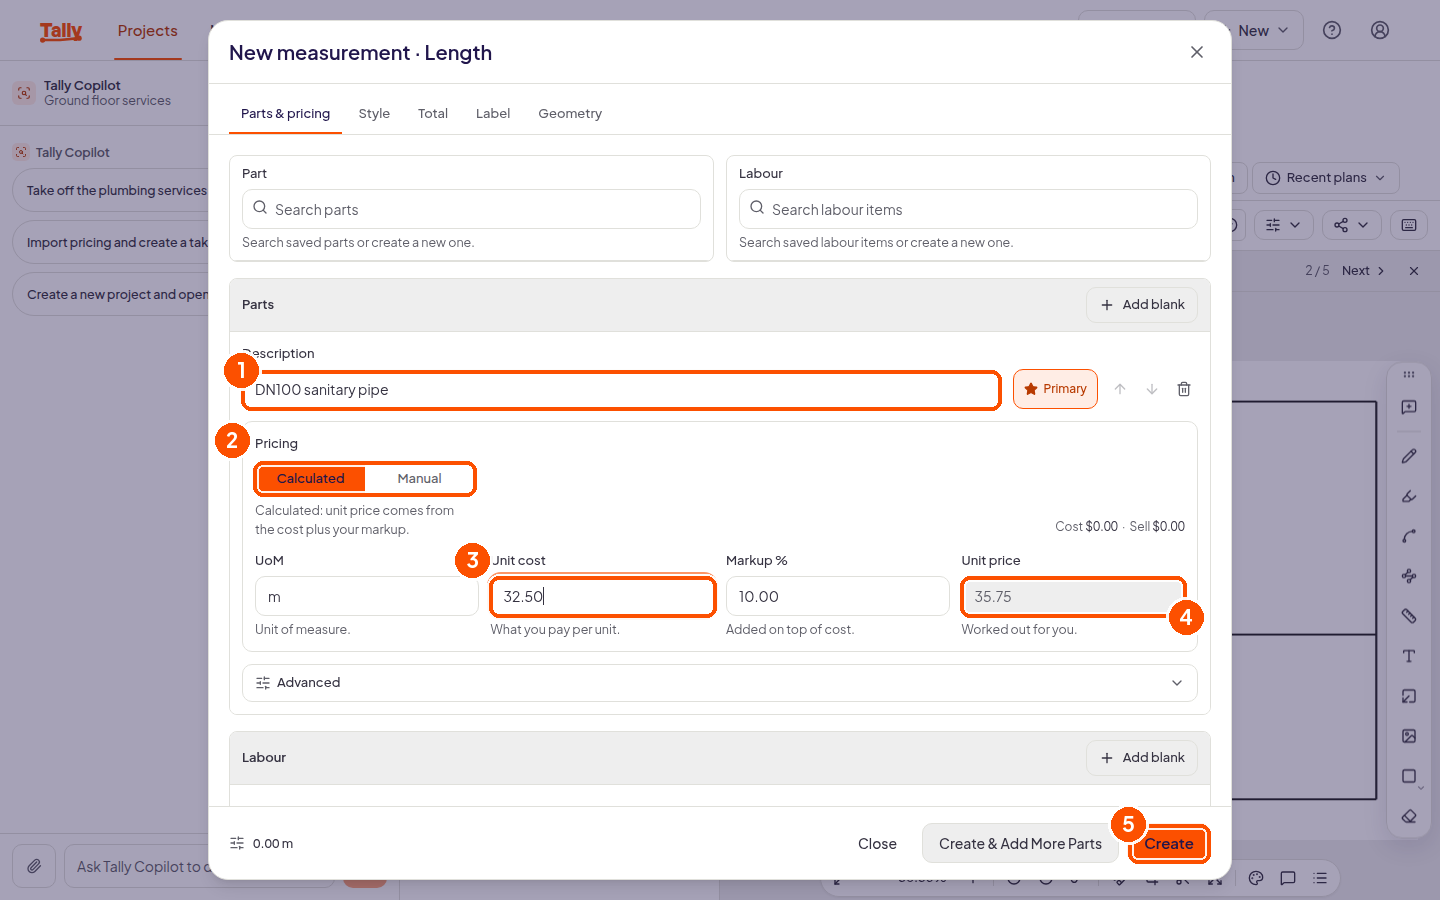
- Choose + Length on the panel, or + Count or + Area. The New measurement dialog opens, named for the kind you picked.
- Fill in Description. The field asks the right question: what are you measuring? Until you answer it the dialog tells you a description is needed and Create stays switched off.
- Put in a Unit cost. Leave pricing on Calculated and the Unit price is worked out from your cost plus the Markup %, which starts at 10.00. See price your takeoff for the whole story.
- Choose Create. The dialog closes and you drop straight into drawing mode.
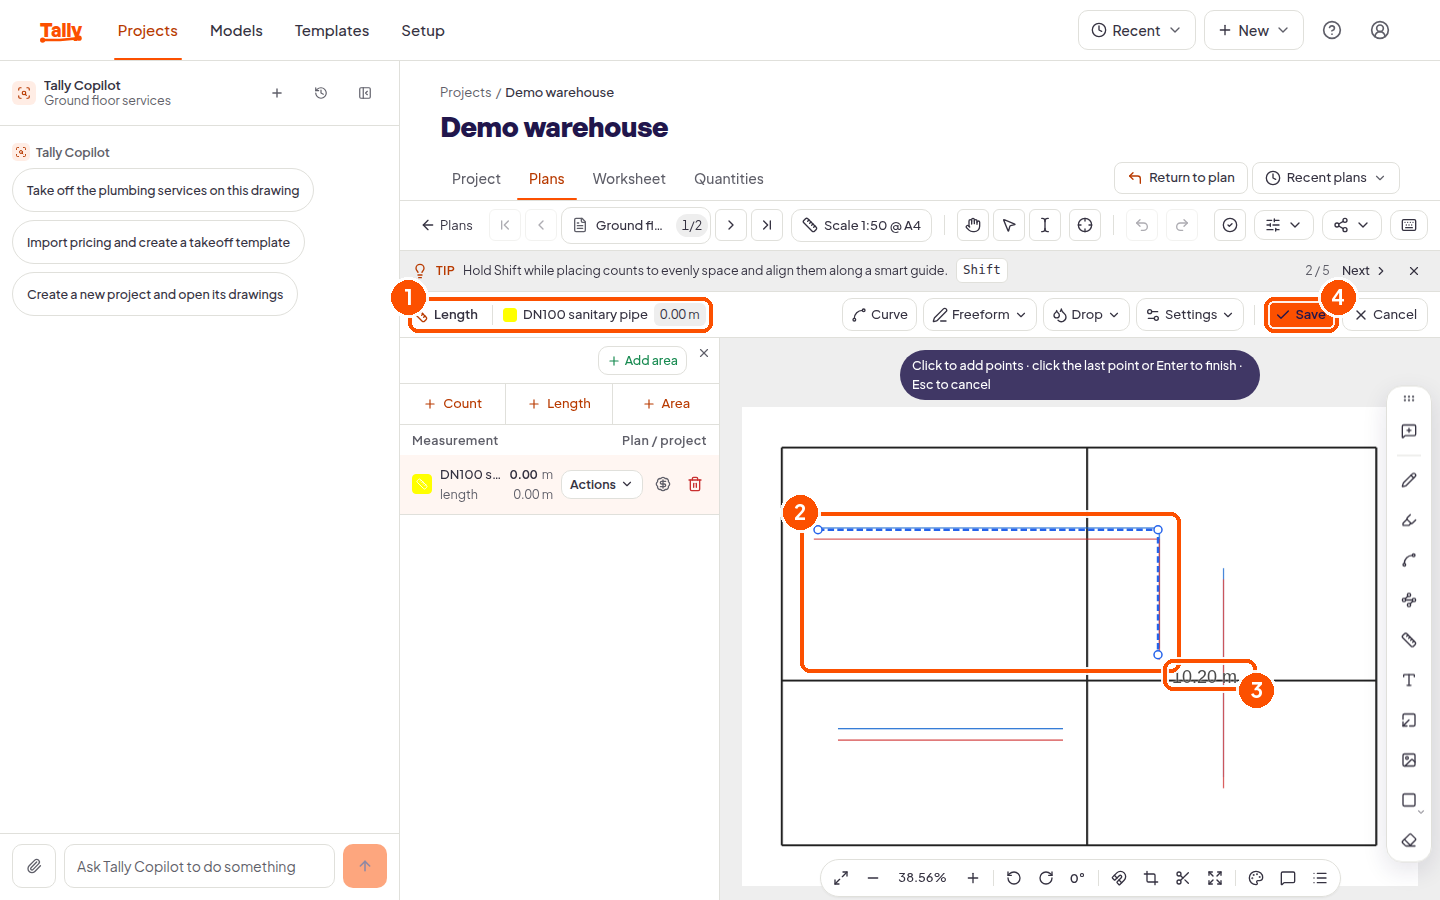
- Click along what you are measuring. The running total is drawn live on the canvas as you go.
- Finish it. For a length or an area, press Enter or click the last point again, then choose Save. For a count, choose Done when you have placed them all.
Already priced when you save it
This is the part that surprises people coming from other takeoff tools. A measurement is not just a quantity: it carries the part and the labour it is made of, with their rates, which is why the worksheet is already priced when you get there.
The Part box at the top searches your saved parts, and the field says what it does: search saved parts or create a new one. Picking one fills the cost and the unit for you. Labour below it works the same way.
Create & Add More Parts at the foot is for a measurement that is more than one thing, such as pipe plus fittings on the same run.
The other tabs in that dialog
Style sets its colour and, for a count, its symbol. Total, Label and Geometry control how the measurement is totalled, what it shows on the sheet, and its shape. You can ignore all four to start with, and come back once you have a takeoff to tidy.
Drawing accurately
The canvas tells you the rules while you draw: click to add points, click the last point or press Enter to finish, Esc to cancel.
Curve and Freeform on the draw bar change how the line is made. For curves, the editor’s own tip is the clearest instruction there is: “In Length or Area Curve, choose a start point, a point on the curve, and an end point. In Area, repeat the last two steps to chain curves.”
The magnet in the bottom bar is what keeps you honest. In the app’s words: “Toggle the magnet in the bottom bar to snap to your own measurements, plus plan lines and corners on vector (PDF) plans.” On a scan there are no lines to snap to, so you are on your own.
Hold Shift while drawing to lock a line to 15 degree increments, and while counting to space and align symbols along a smart guide.
Reading the panel
Each saved measurement gets a row with its colour and two numbers. The first is what it measures on this drawing. The second is the same measurement after its area multiplier is applied, which is the number that reaches the worksheet. On a job with no areas, or a multiplier of 1, they are identical.
The row also carries a pricing control and a delete control, and Collapse panel gives the drawing more room when you need it.
Fixing something
Nothing is locked. Select a measurement to adjust it, and use Ctrl or Cmd with Z and Y to undo and redo. A measurement you got wrong can be edited or deleted at any point, and the worksheet follows.
Next
If a sheet is covered in the same symbol, do not click them one by one. See count with Tally Assist.